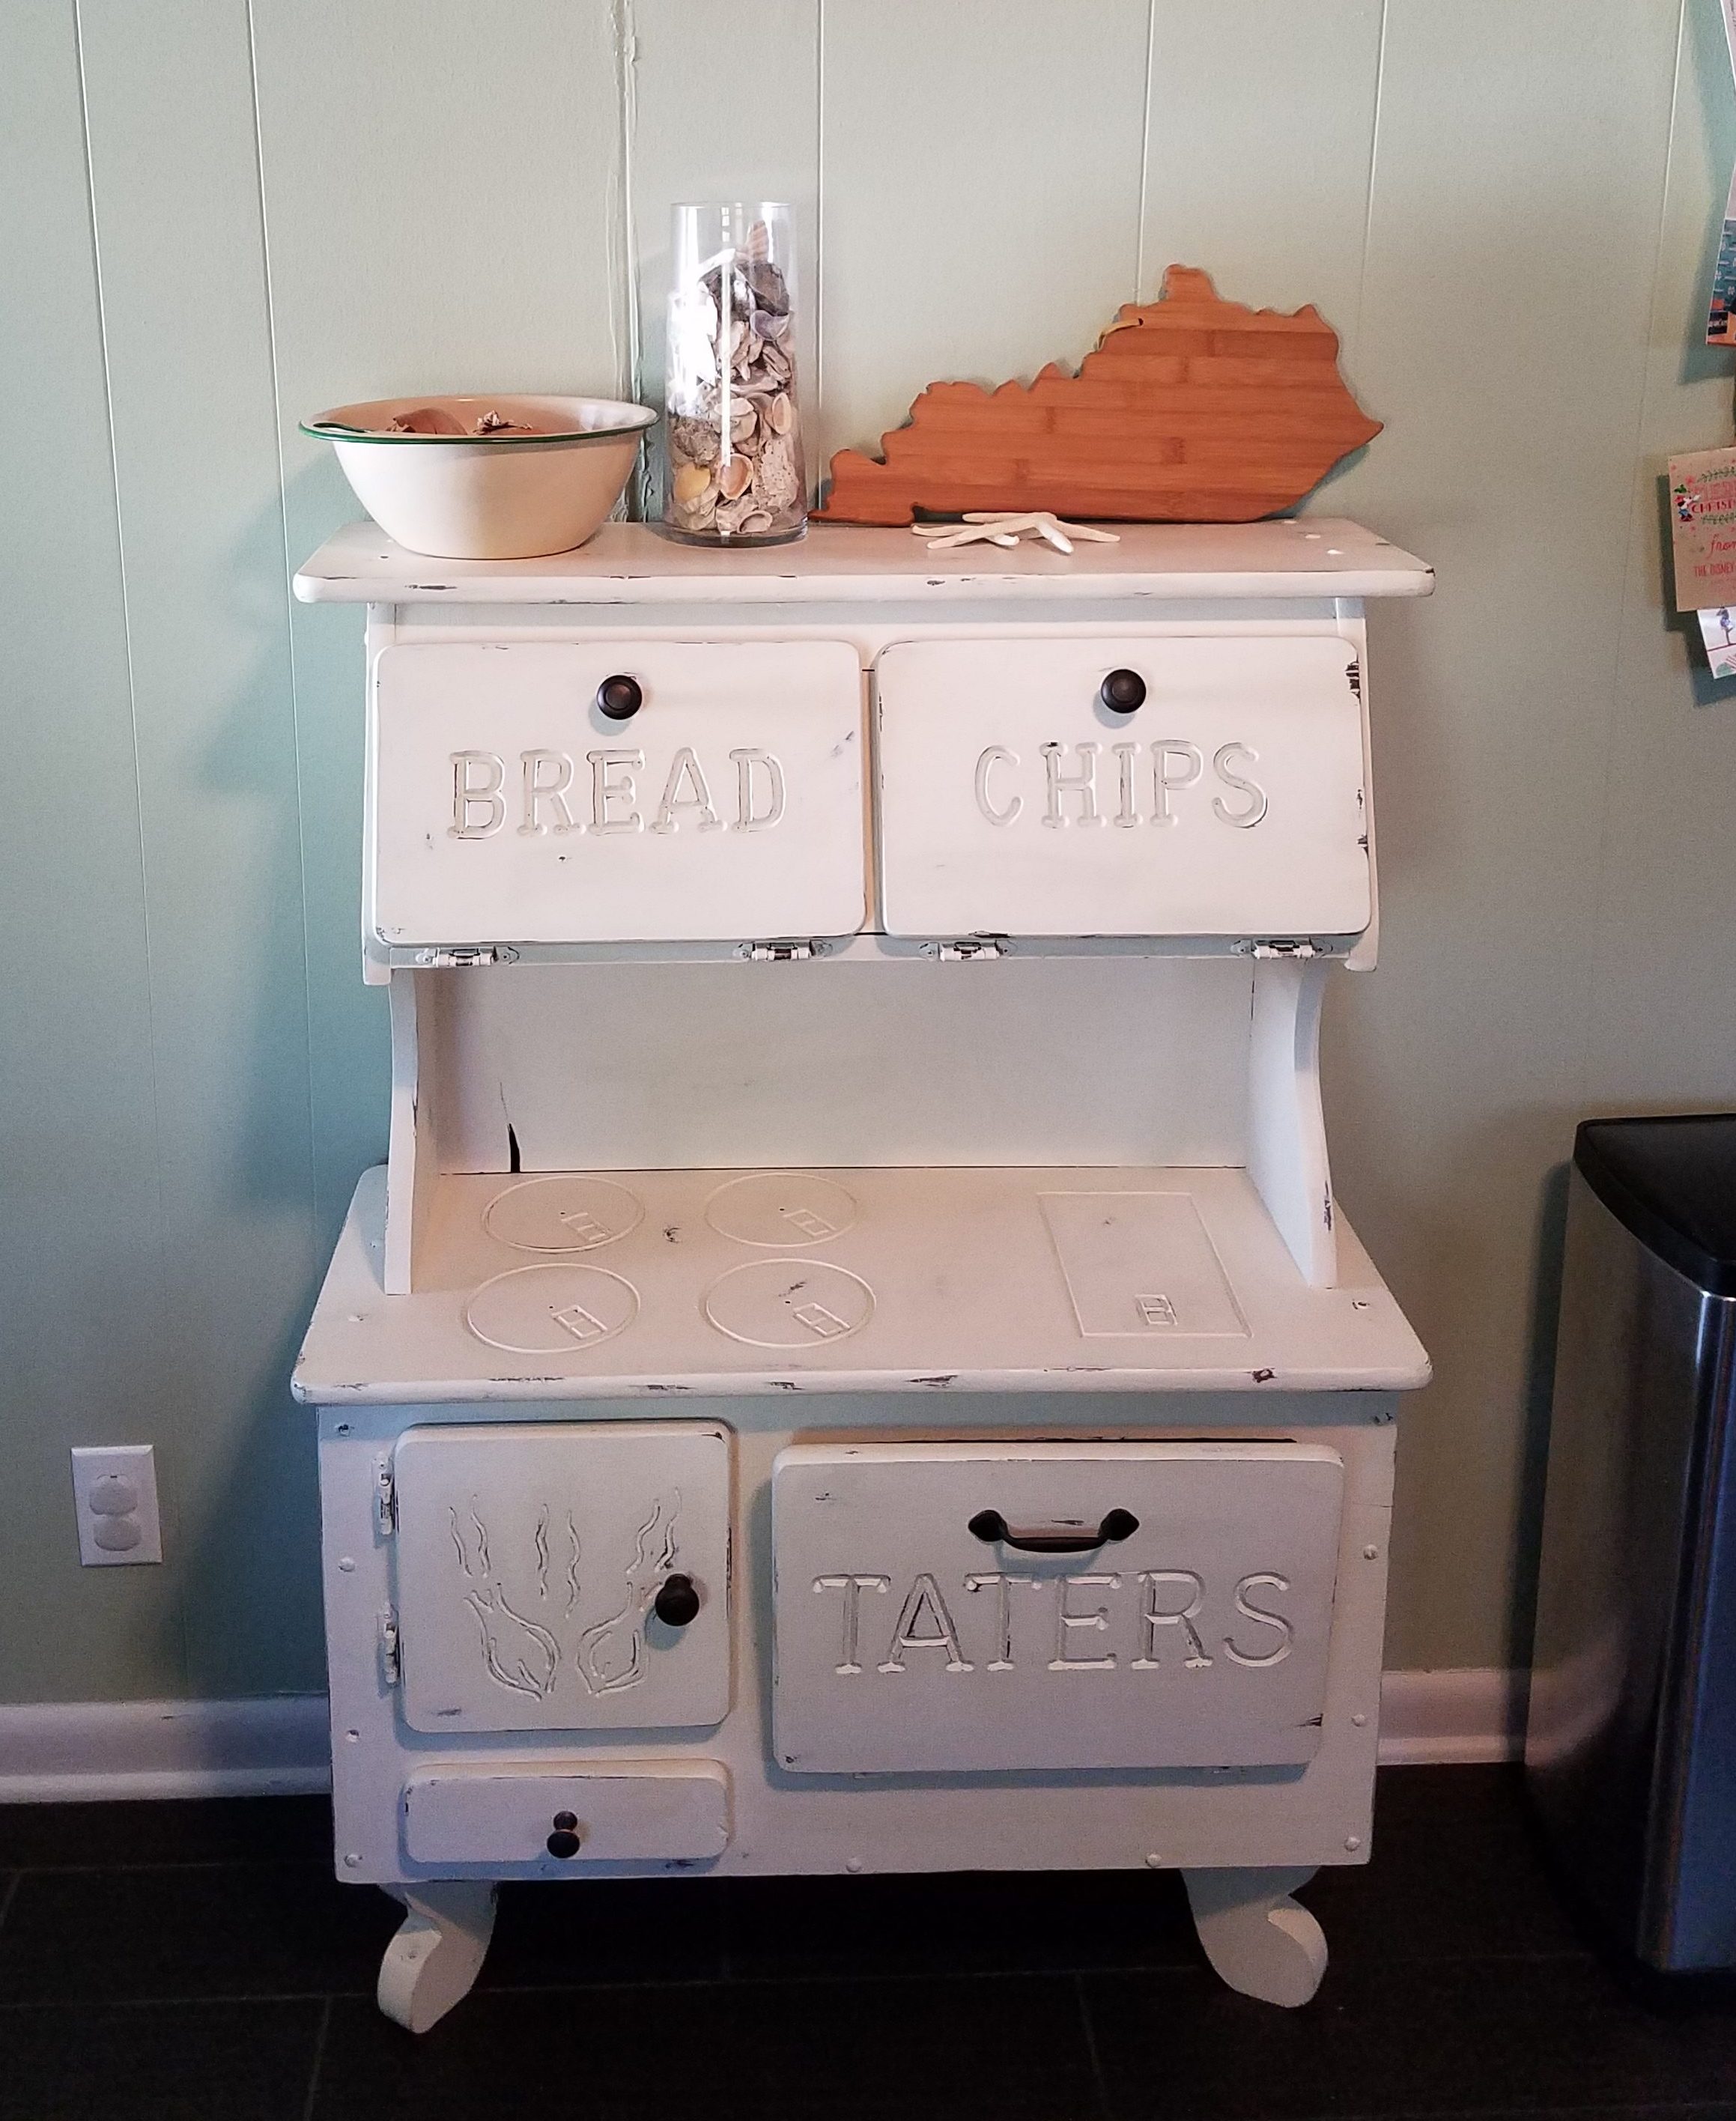
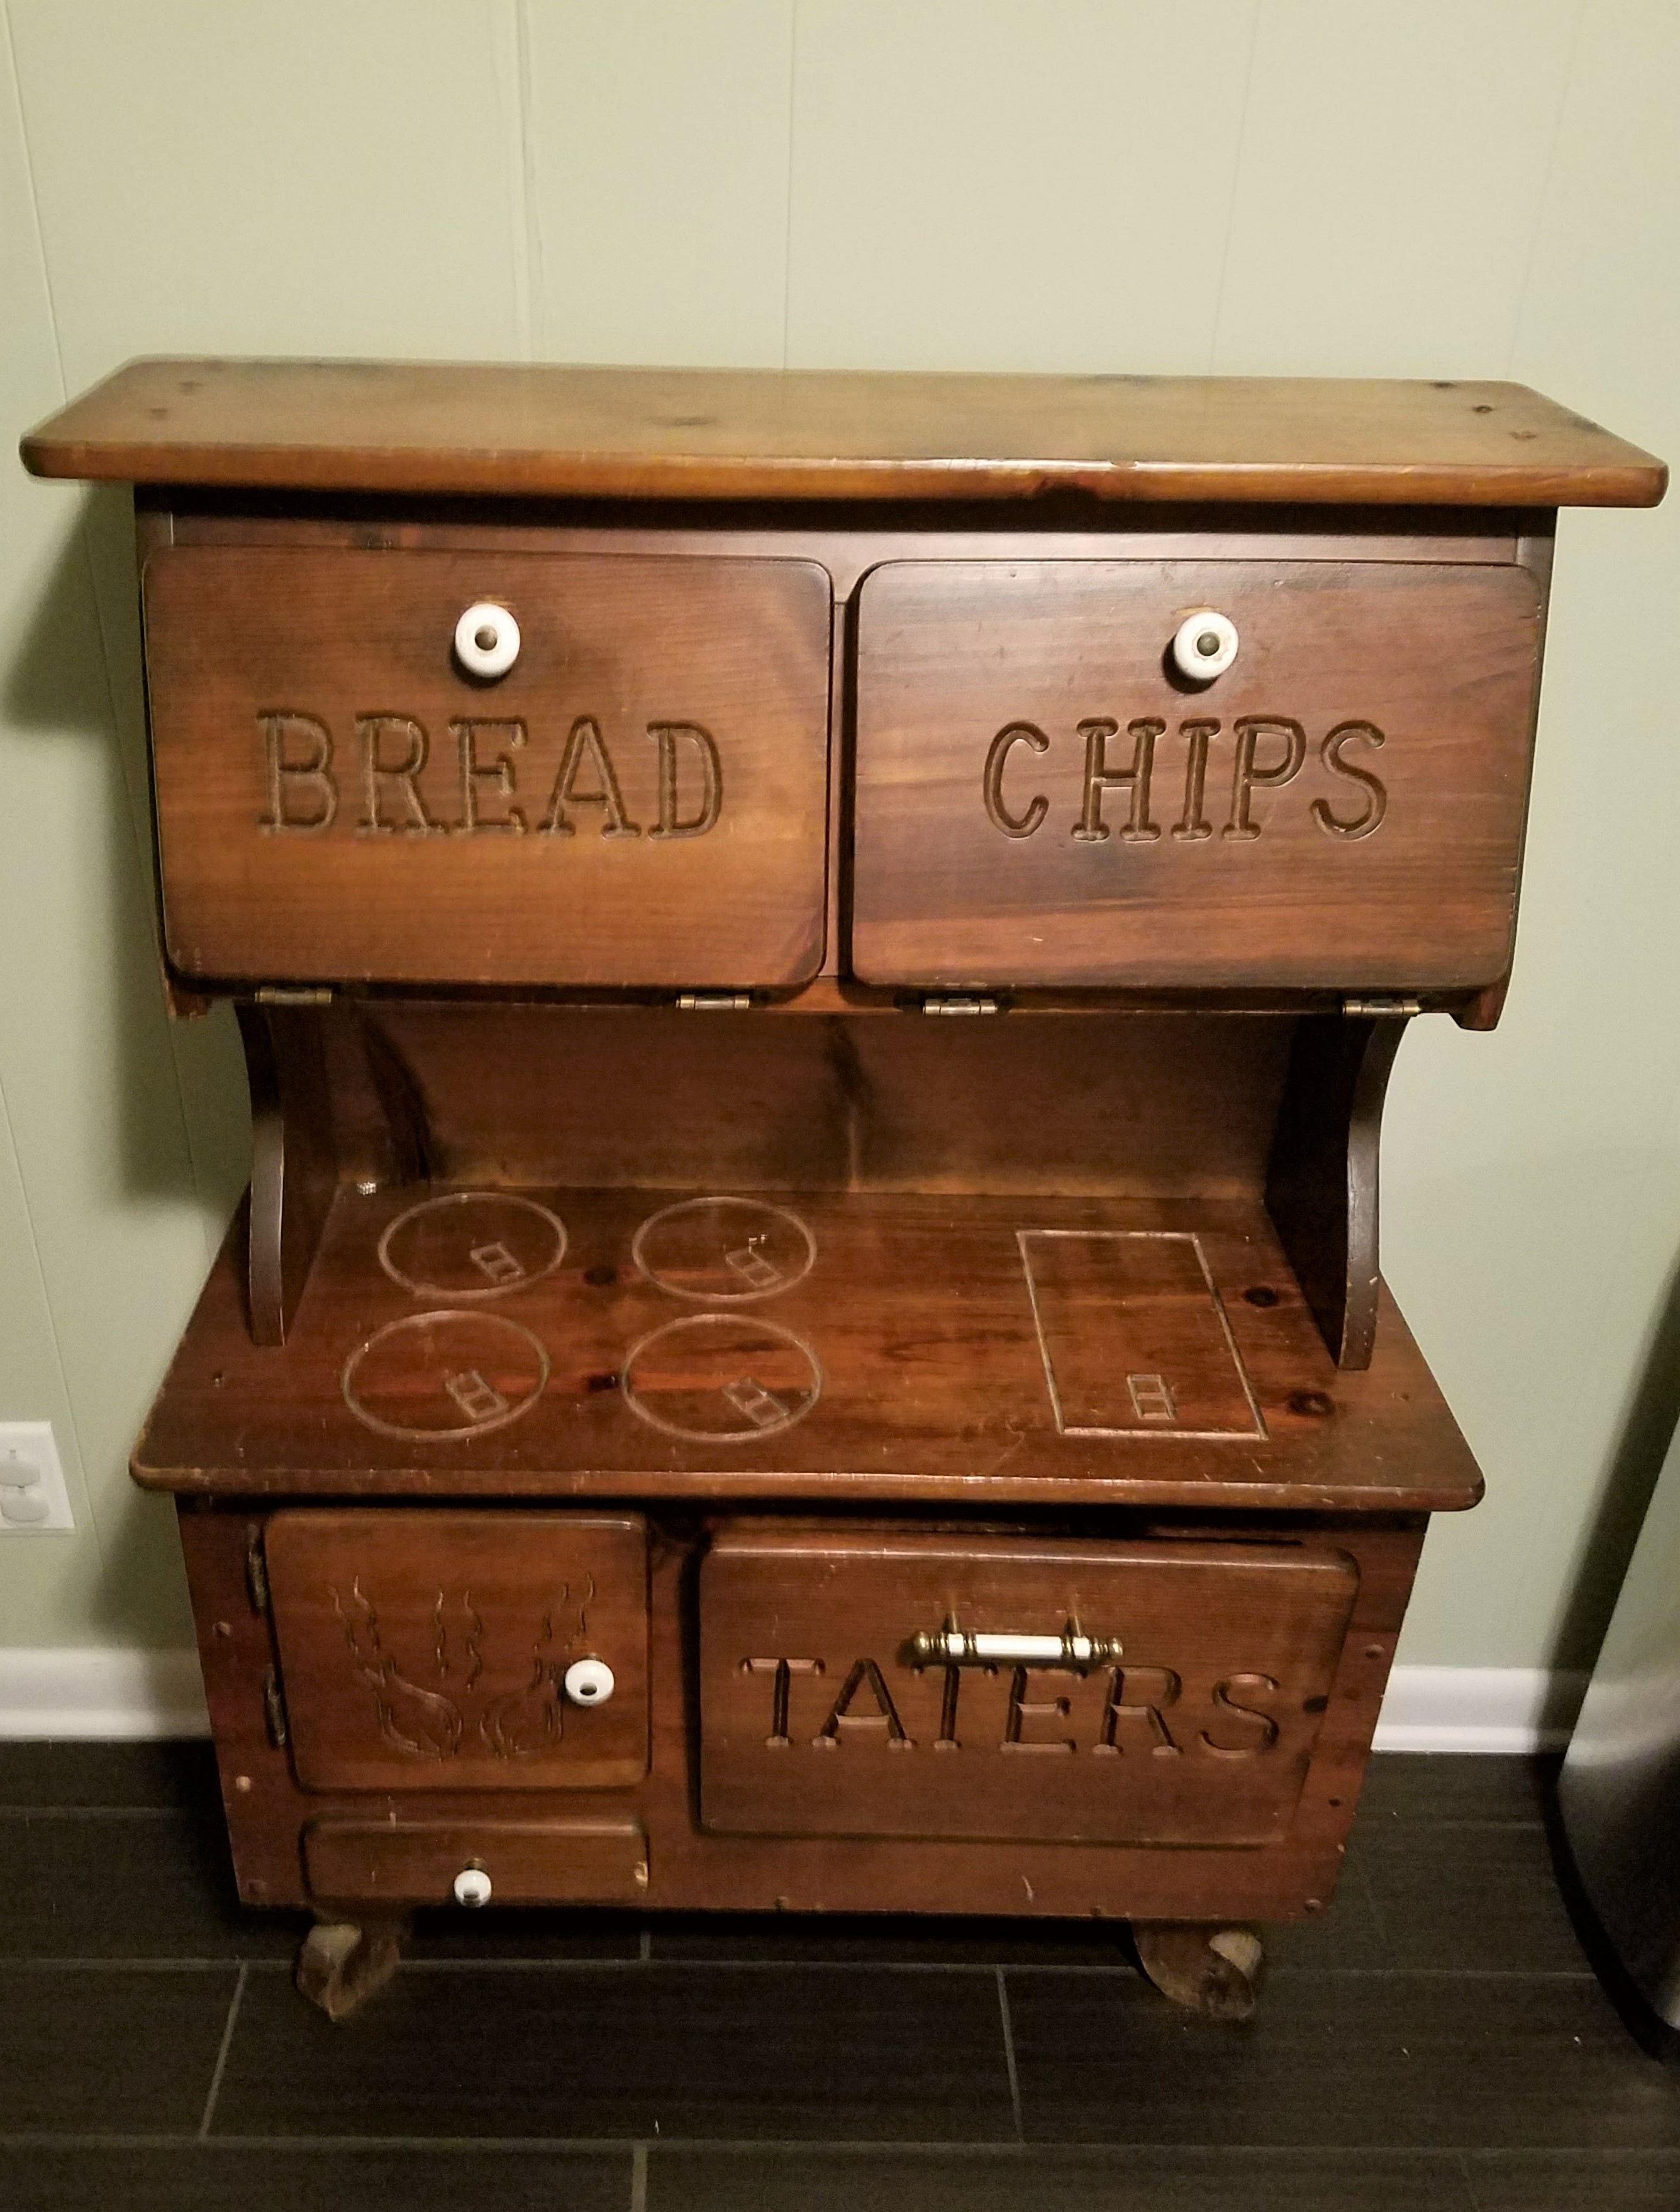
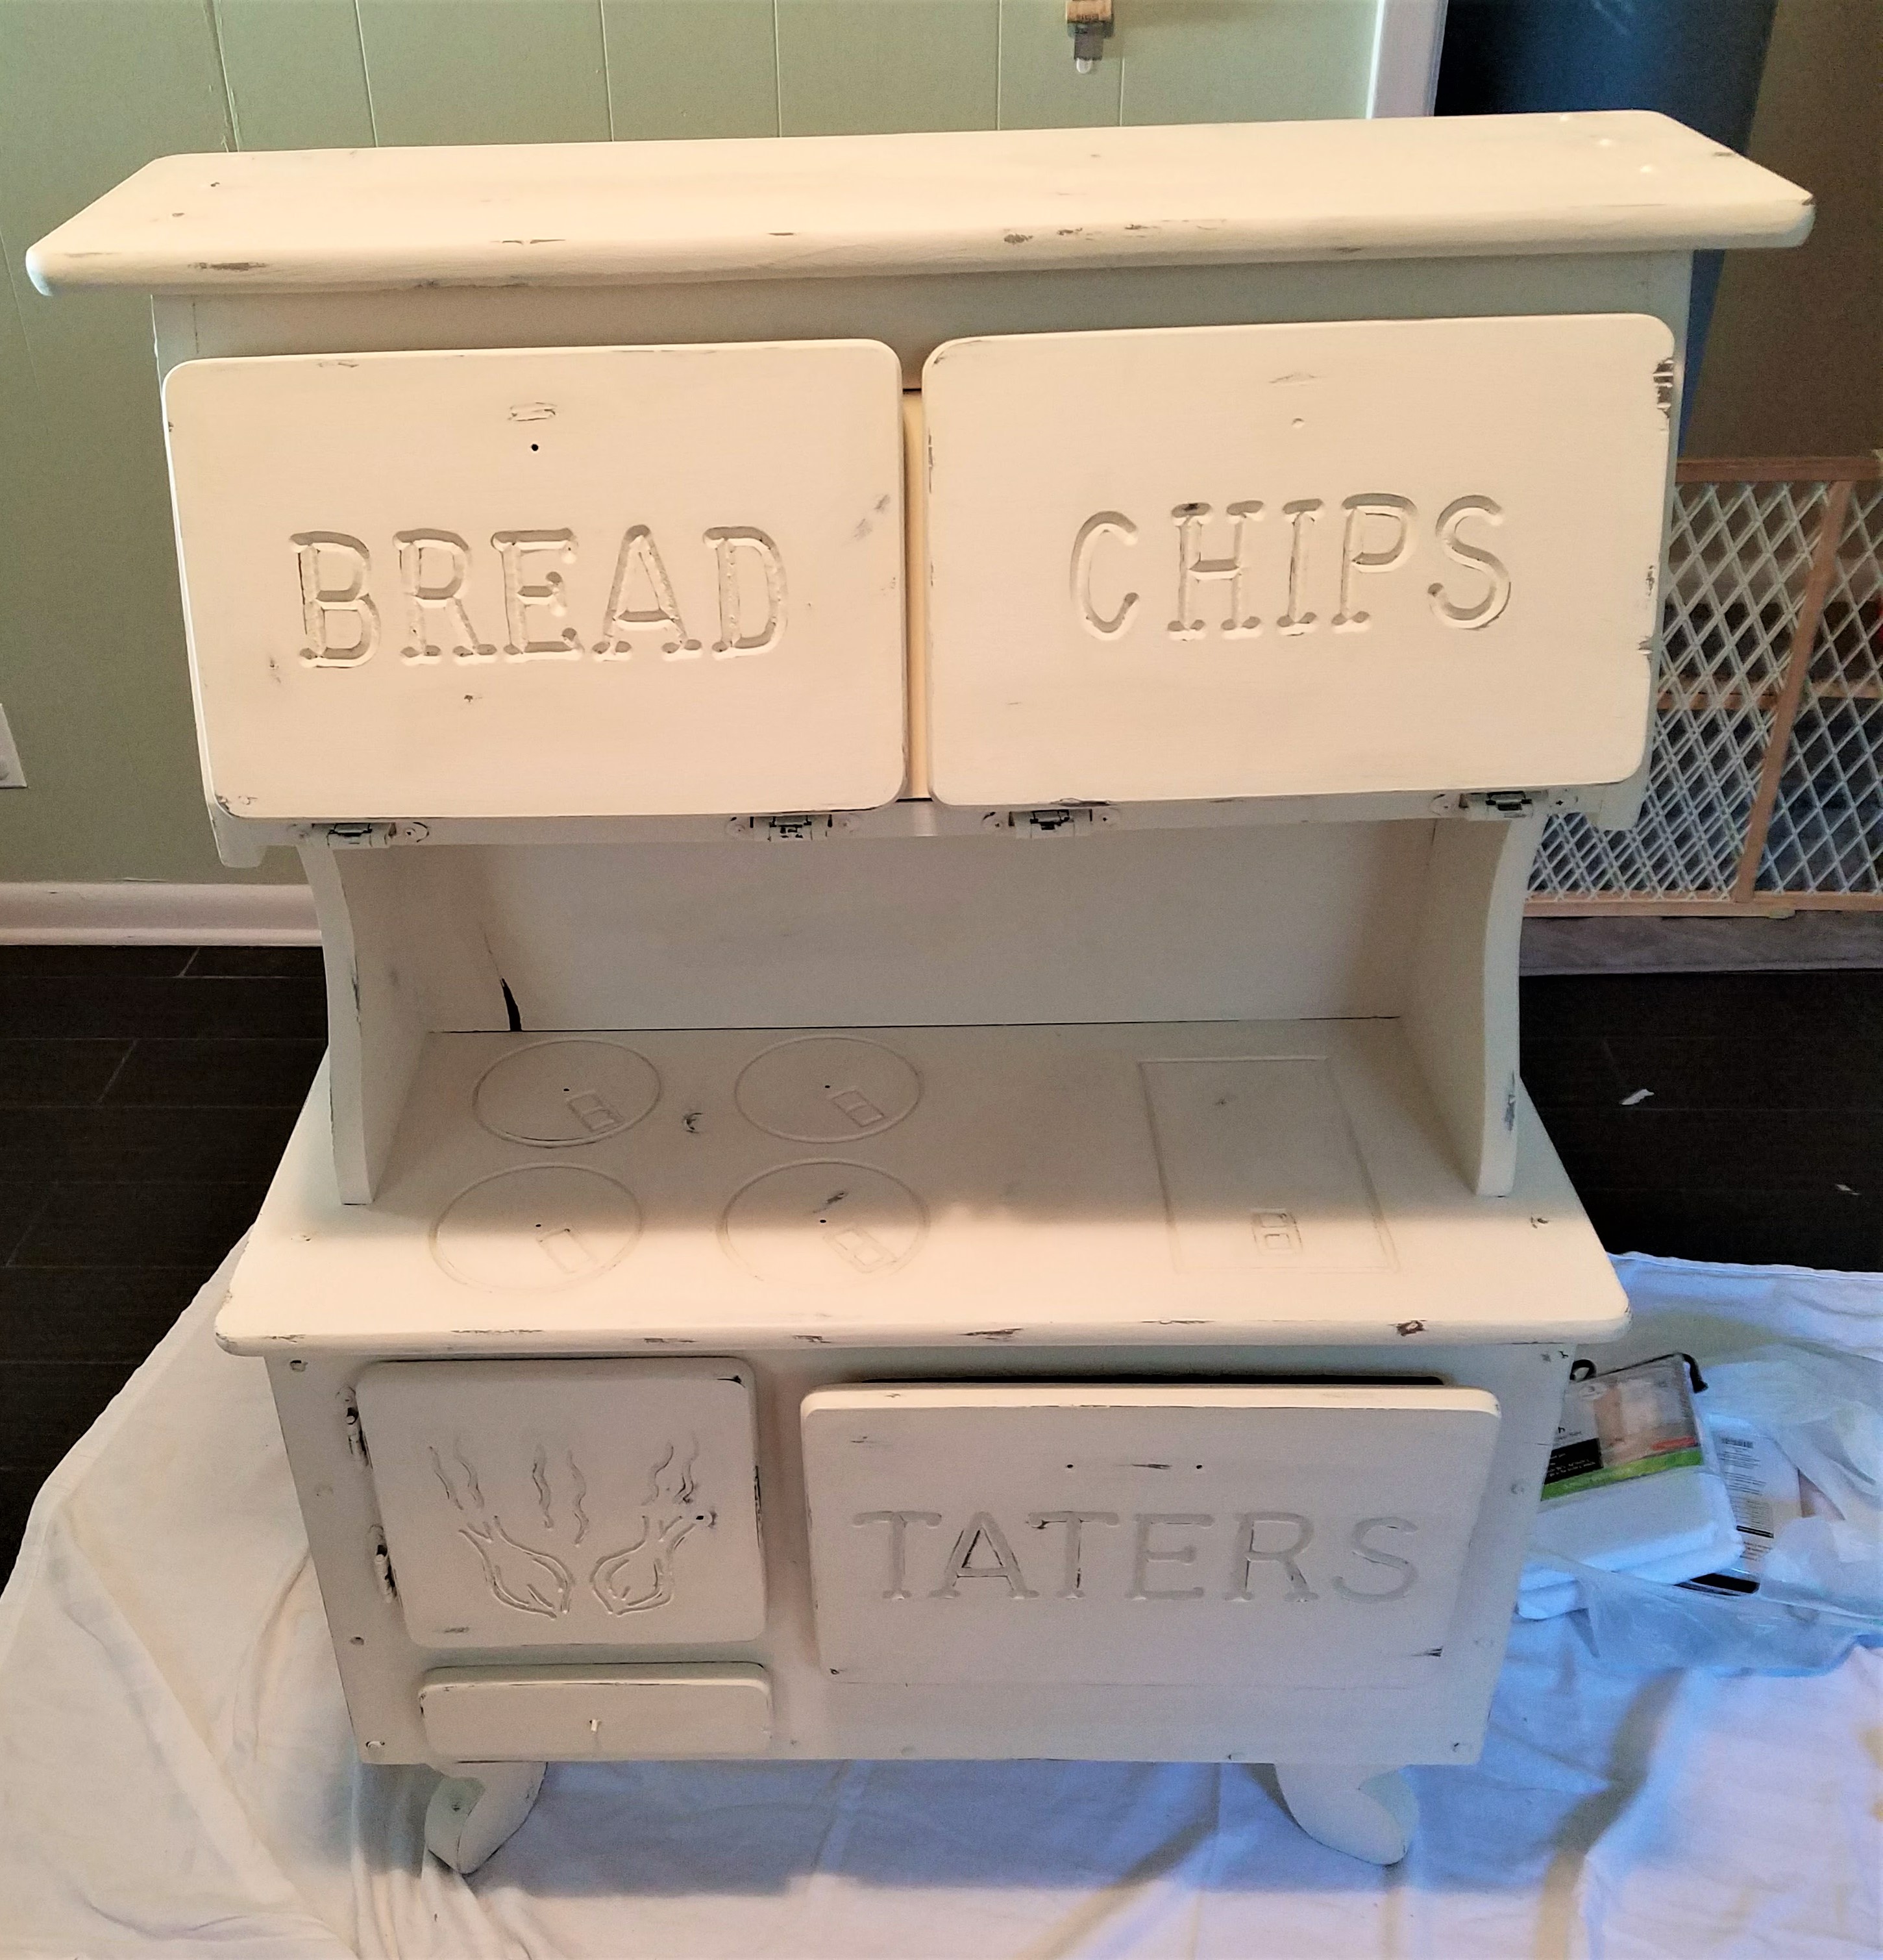
“Taters”, this is probably my husband’s least favorite word. Though, he tries to lovingly call an old cabinet that I inherited from my Mammaw, “the tater box”. I prefer “brown cabinet”; I feel like there is less negative connotations with it. But whatever you want to call it, it’s not the old outdated piece of furniture it used to be.
Mr. O has tried since we acquired the cabinet, about 2 years ago, to get me to either paint it or get rid of it. And getting rid of the cabinet was a big H-E-LL no! (He doesn’t get the whole emotionally connected to physical objects thing.) And while I agreed with him that the cabinet didn’t entirely match our decor, I just couldn’t let it go and for a few reasons.

One, as much as it was outdated, I couldn’t help but to think about the Saturdays I used to spend at my Mammaw and Papaw’s house when I was young. I remember the train whistle sounding at 12 o’clock, queuing lunch time. A fried hamburger on a white bun, (that’s all they made back then), with iceberg lettuce, a slice of sweet onion, and good ole Lay’s potato chips set on a paper plate; this was my meal every weekend that I stayed with them. The cabinet housed the plates in the bottom and the chips in the top along with the buns. I can still smell the burger frying on the stove with Mammaw standing close by. And it makes me a bit teary.
The second reason, and the reason I kept regurgitating to Mr. O, was that we NEEDED the extra space it provided in our tiny kitchen. He of course appeased me but would remind me how out of place it looked in our home.
Every few months I would agree that it needed to be painted. My stipulations were that I got to pick out the color and that I would be the one to paint it. Of course, Mr. O could do the hard work of prepping the piece. 😉 But it would never fail that when he would suggest we go get the supplies needed for the project, I would change my mind about wanting the cabinet painted. This seriously went back and forth for a year. And looking back, I realize I was afraid that by changing the appearance of the cabinet, it would change the memories I had of my grandparents. Think about it…look at all the furniture renos you’ve seen. There is an old, outdated, rag-tag looking piece of furniture that is transformed into something that does not resemble anything that it used to be. (Paint works wonders. Kinda like makeup.)
It was the impending arrival of the in-laws for Thanksgiving that inevitably prompted me to pull the plug and get it done. Seriously, I had no intention the weekend before Thanksgiving break of tackling a furniture renovation project. I had already been cleaning, doing laundry, and preparing for Thanksgiving week when I decided at 2:00 pm on Saturday to go get paint. Yikes! I was actually going to do this.
I knew that whatever paint I picked out, I wanted it to still look like my Mammaw’s cabinet. Traditional paint was not going to cut it. (And the Mr. pushed hard towards this direction.) Besides, that brand new look is not my style. So, first order of business was to find a place, before it closed on Saturday afternoon, to get chalk paint. (It’s all the rage if you didn’t know. lol!)
Turns out there is not much to choose from where we live. But there is a consignment shop that sells a lot of reno pieces and the supplies for said reno. So, Little Bear and I loaded up at booked it down to the little shop hoping to catch it still open. Oh boy was it open…..I had never seen so many cars there! The two of us walked in and bee-lined the register to ask about the paint. Turns out they were having a holiday event and the founder of said paint we were going to buy was there doing a demo. Whaaaaaa?! Our semi quick trip to pick out a paint color was extended. And good thing too! Because I’m not sure if I would have started painting that cabinet if I hadn’t seen the paint in action.
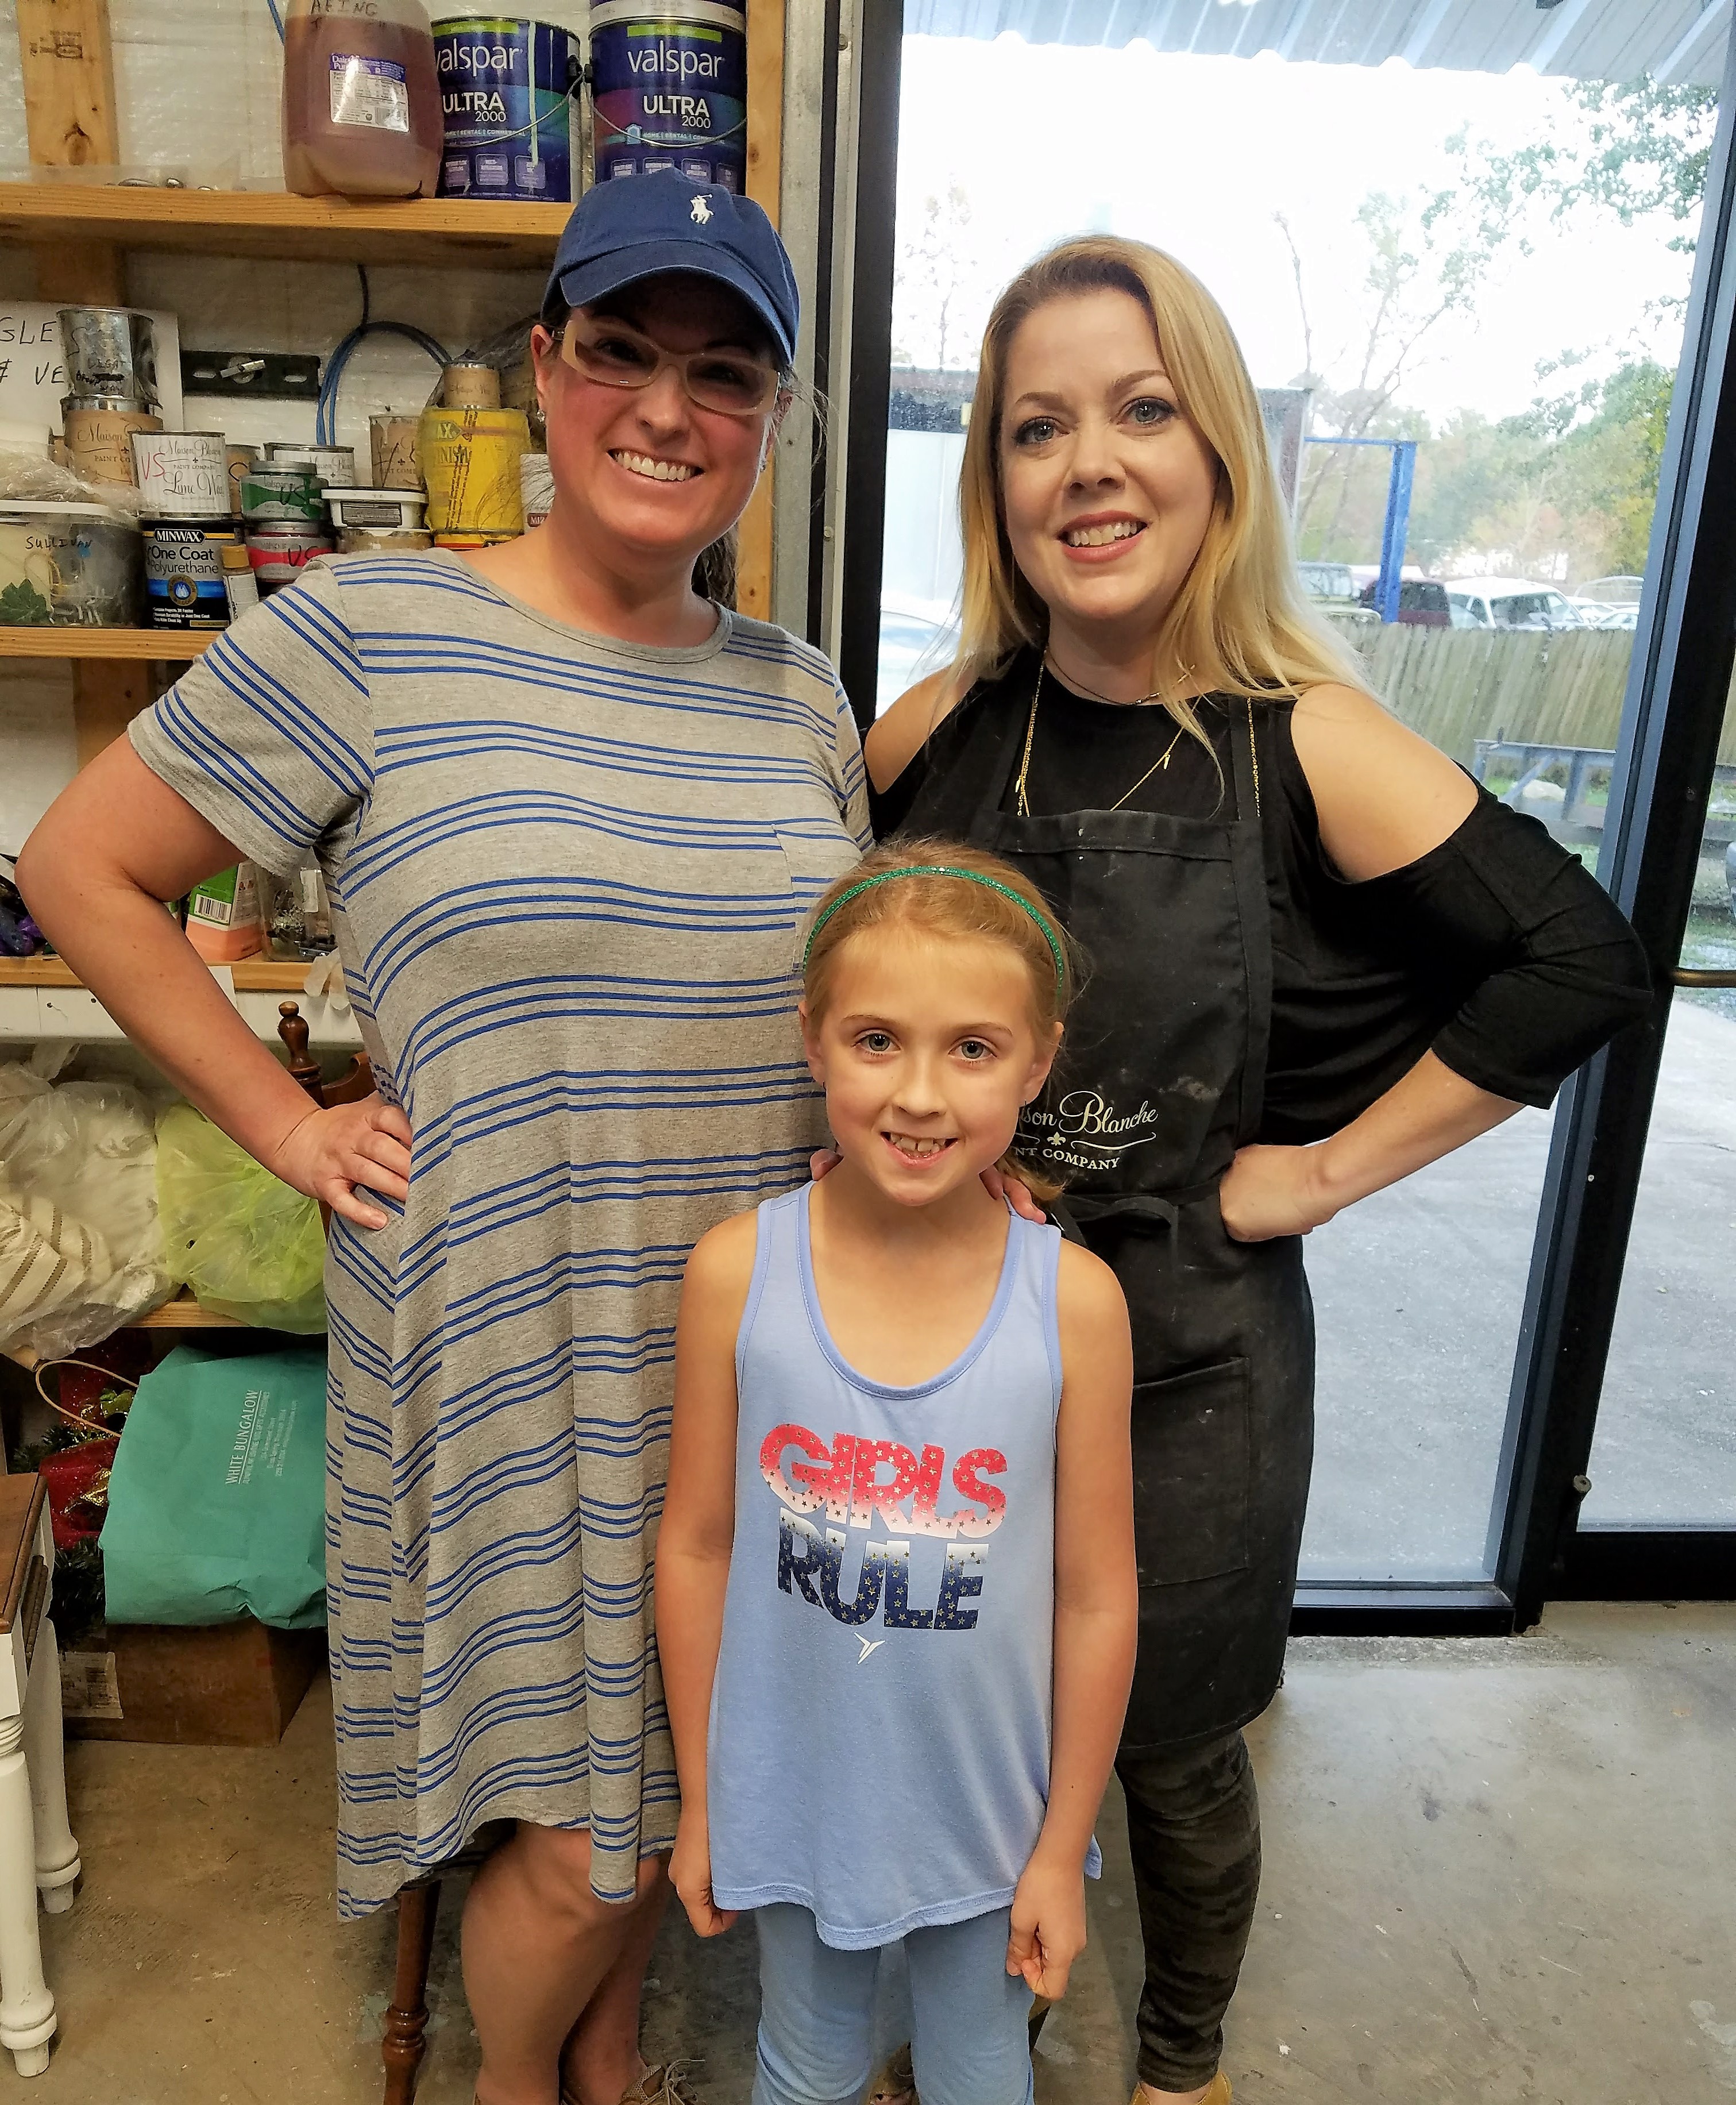
Annie Omar, Maison Blanche Paint Company founder and creator, gave the best demo on the Lime Paint line. And she even answered some questions for me about paint and wax choices for my project. Annie is so full of knowledge and enthusiasm for the Masion Blanch products that it’s truly contagious. But you can inform and promote your product all day long and it doesn’t mean a hill of beans if it doesn’t hold up to it’s word. Let me tell you, I LOVE this stuff!!!! And it definitely holds up to the hype.
As a novice furniture painter, I was extremely nervous to begin renovating the cabinet. I just knew it was going to be painstakingly hard. Not the case at all!

Let me begin by saying: all chalk paint is NOT created equal.
And Maison Blanche Furniture Paint is not like other chalk paints. See, part of the reason I dreaded painting were the overwhelming reviews from chalk painters that chalk paint is thick and needs to be thinned in a small container before applying. And I just ain’t got time for that! I have a toddler running around and an 8 year old that can’t entertain herself on the weekends. So you can imagine the pleasant surprise I got when I opened my Maison Blanche. You guys! The MB Vintage Furniture paint is so silky and smooth! No clumps what so ever. I was able to just dip my brush and go. And it goes on so easy! (I’m guessing this is because it’s water-based.) Plus, I did not get knocked out by the smell. All the MB paints are low in OVC (organic volatile compounds) which means no harsh smell. And that’s great for this momma who already suffers from migraines. I was actually able to do the entire project in the kitchen.

Price wise, MB runs pretty much the same as other high end brands. Their website sells a 32 oz can of Maison Blanche Vintage Furniture Paint for $38.95. And this may seem steep but you are not going to use the entire can on one project. I did two coats on our cabinet and still had about 3/4 can left. And a 500ml of antique wax is just $32.99. I used only about a third of my can and I think I was heavy handed. So I feel like the price is completely doable. And if you factor in the time and money saved with not having to prep with primers, it’s a big win. (I just wiped my piece down with a damp cloth and let it dry before I started!)
Now let’s talk colors and supplies. I was almost in over load with the variety of paint and wax choices. But in a good way. There are about 4 different whites, and over 40 color choices in all. I wanted a farmhouse, vintage feel so I went with a more subdued white call Oyster. I topped it with a protective layer of the clear wax. But there are 7 different color to choose from to give your piece that perfect finishing touch.


I could have very well bought brushes at my local Masion Blanche stockist but I had a good quality angel brush at home so I just used that to paint. I did pick up a few sizes of chip brushes at Lowe’s, though, since I wasn’t sure what I wanted. (Remember, I was a newbie.) I went with cheapys….I got 2, 3-in and a few 1-in brushes. The smaller chip brushes came in handy for painting all the etching and the bigger brush was reserved for applying wax. Buffing, the step that smooths out the wax after it sets, can be done two ways: an old soft cloth or clear plastic bags. Yep, you read that right. You can buff using plain clear trash bags. I learned this trick from Annie. But I did up using the cloth method because I forgot to pick up bags before I went home that night. And boy I wish I had. It would have been so much easier than using the old t-shirt Mr. O gave me. I know for the next time, though.

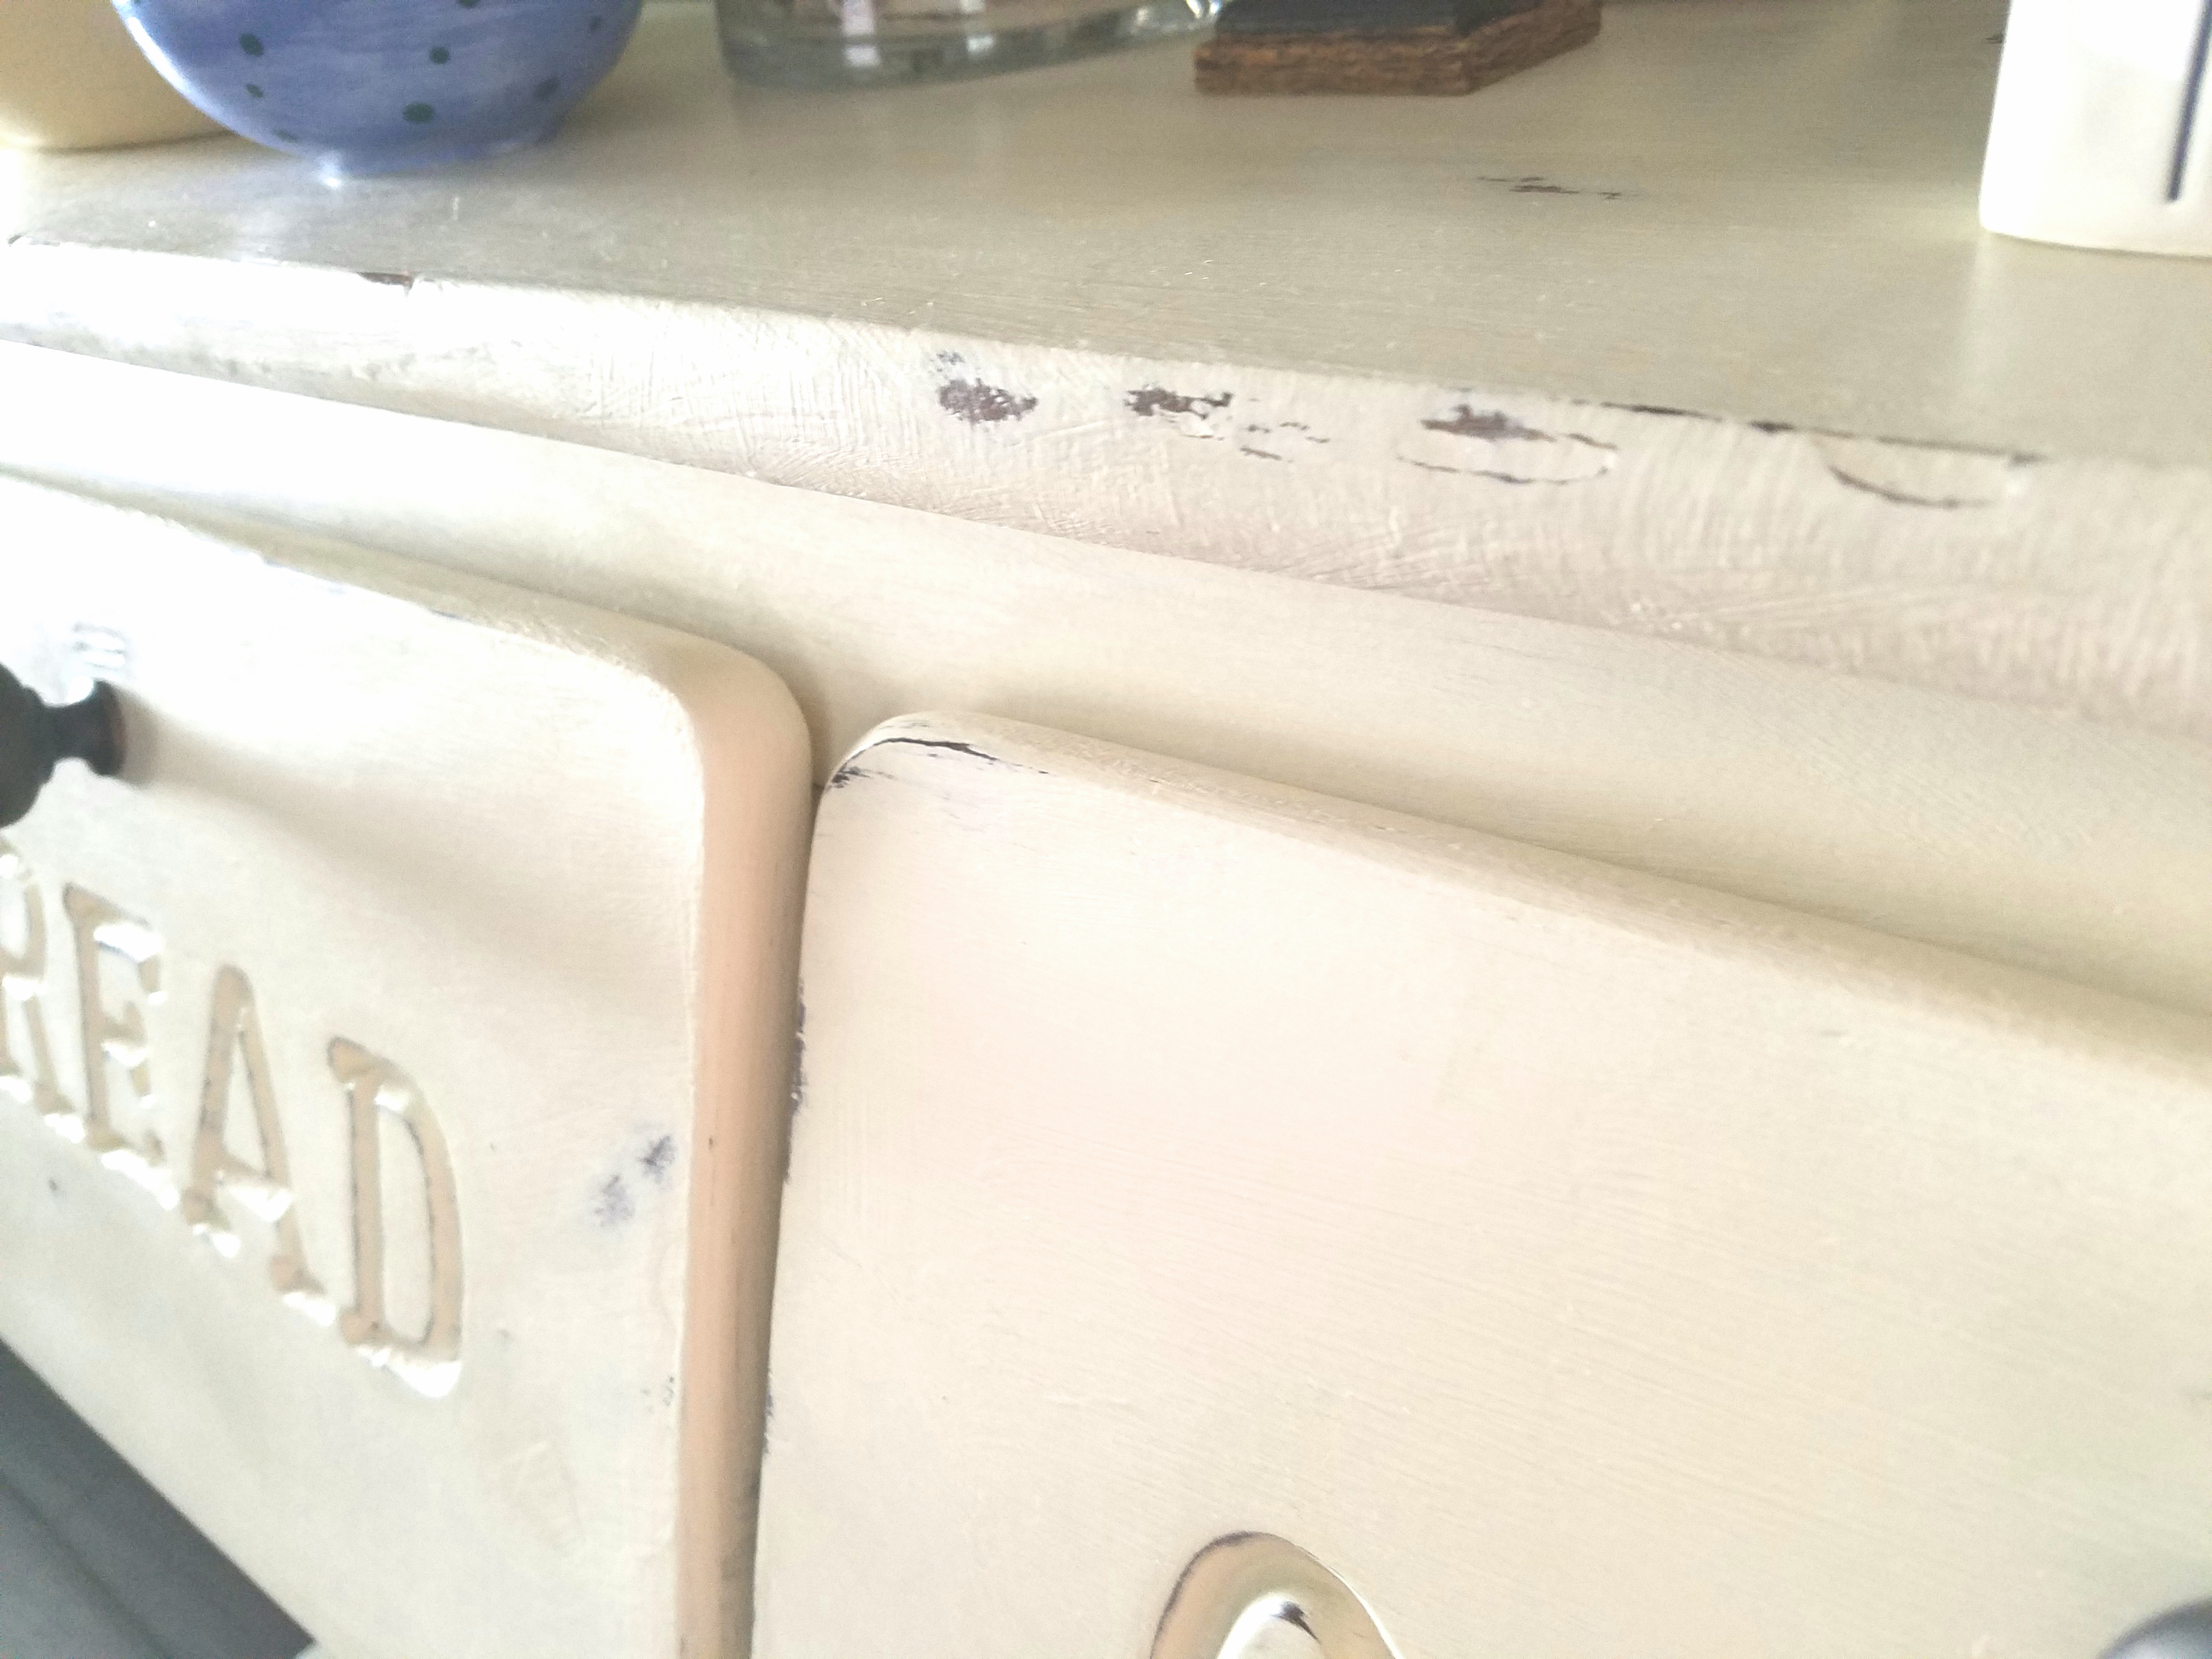
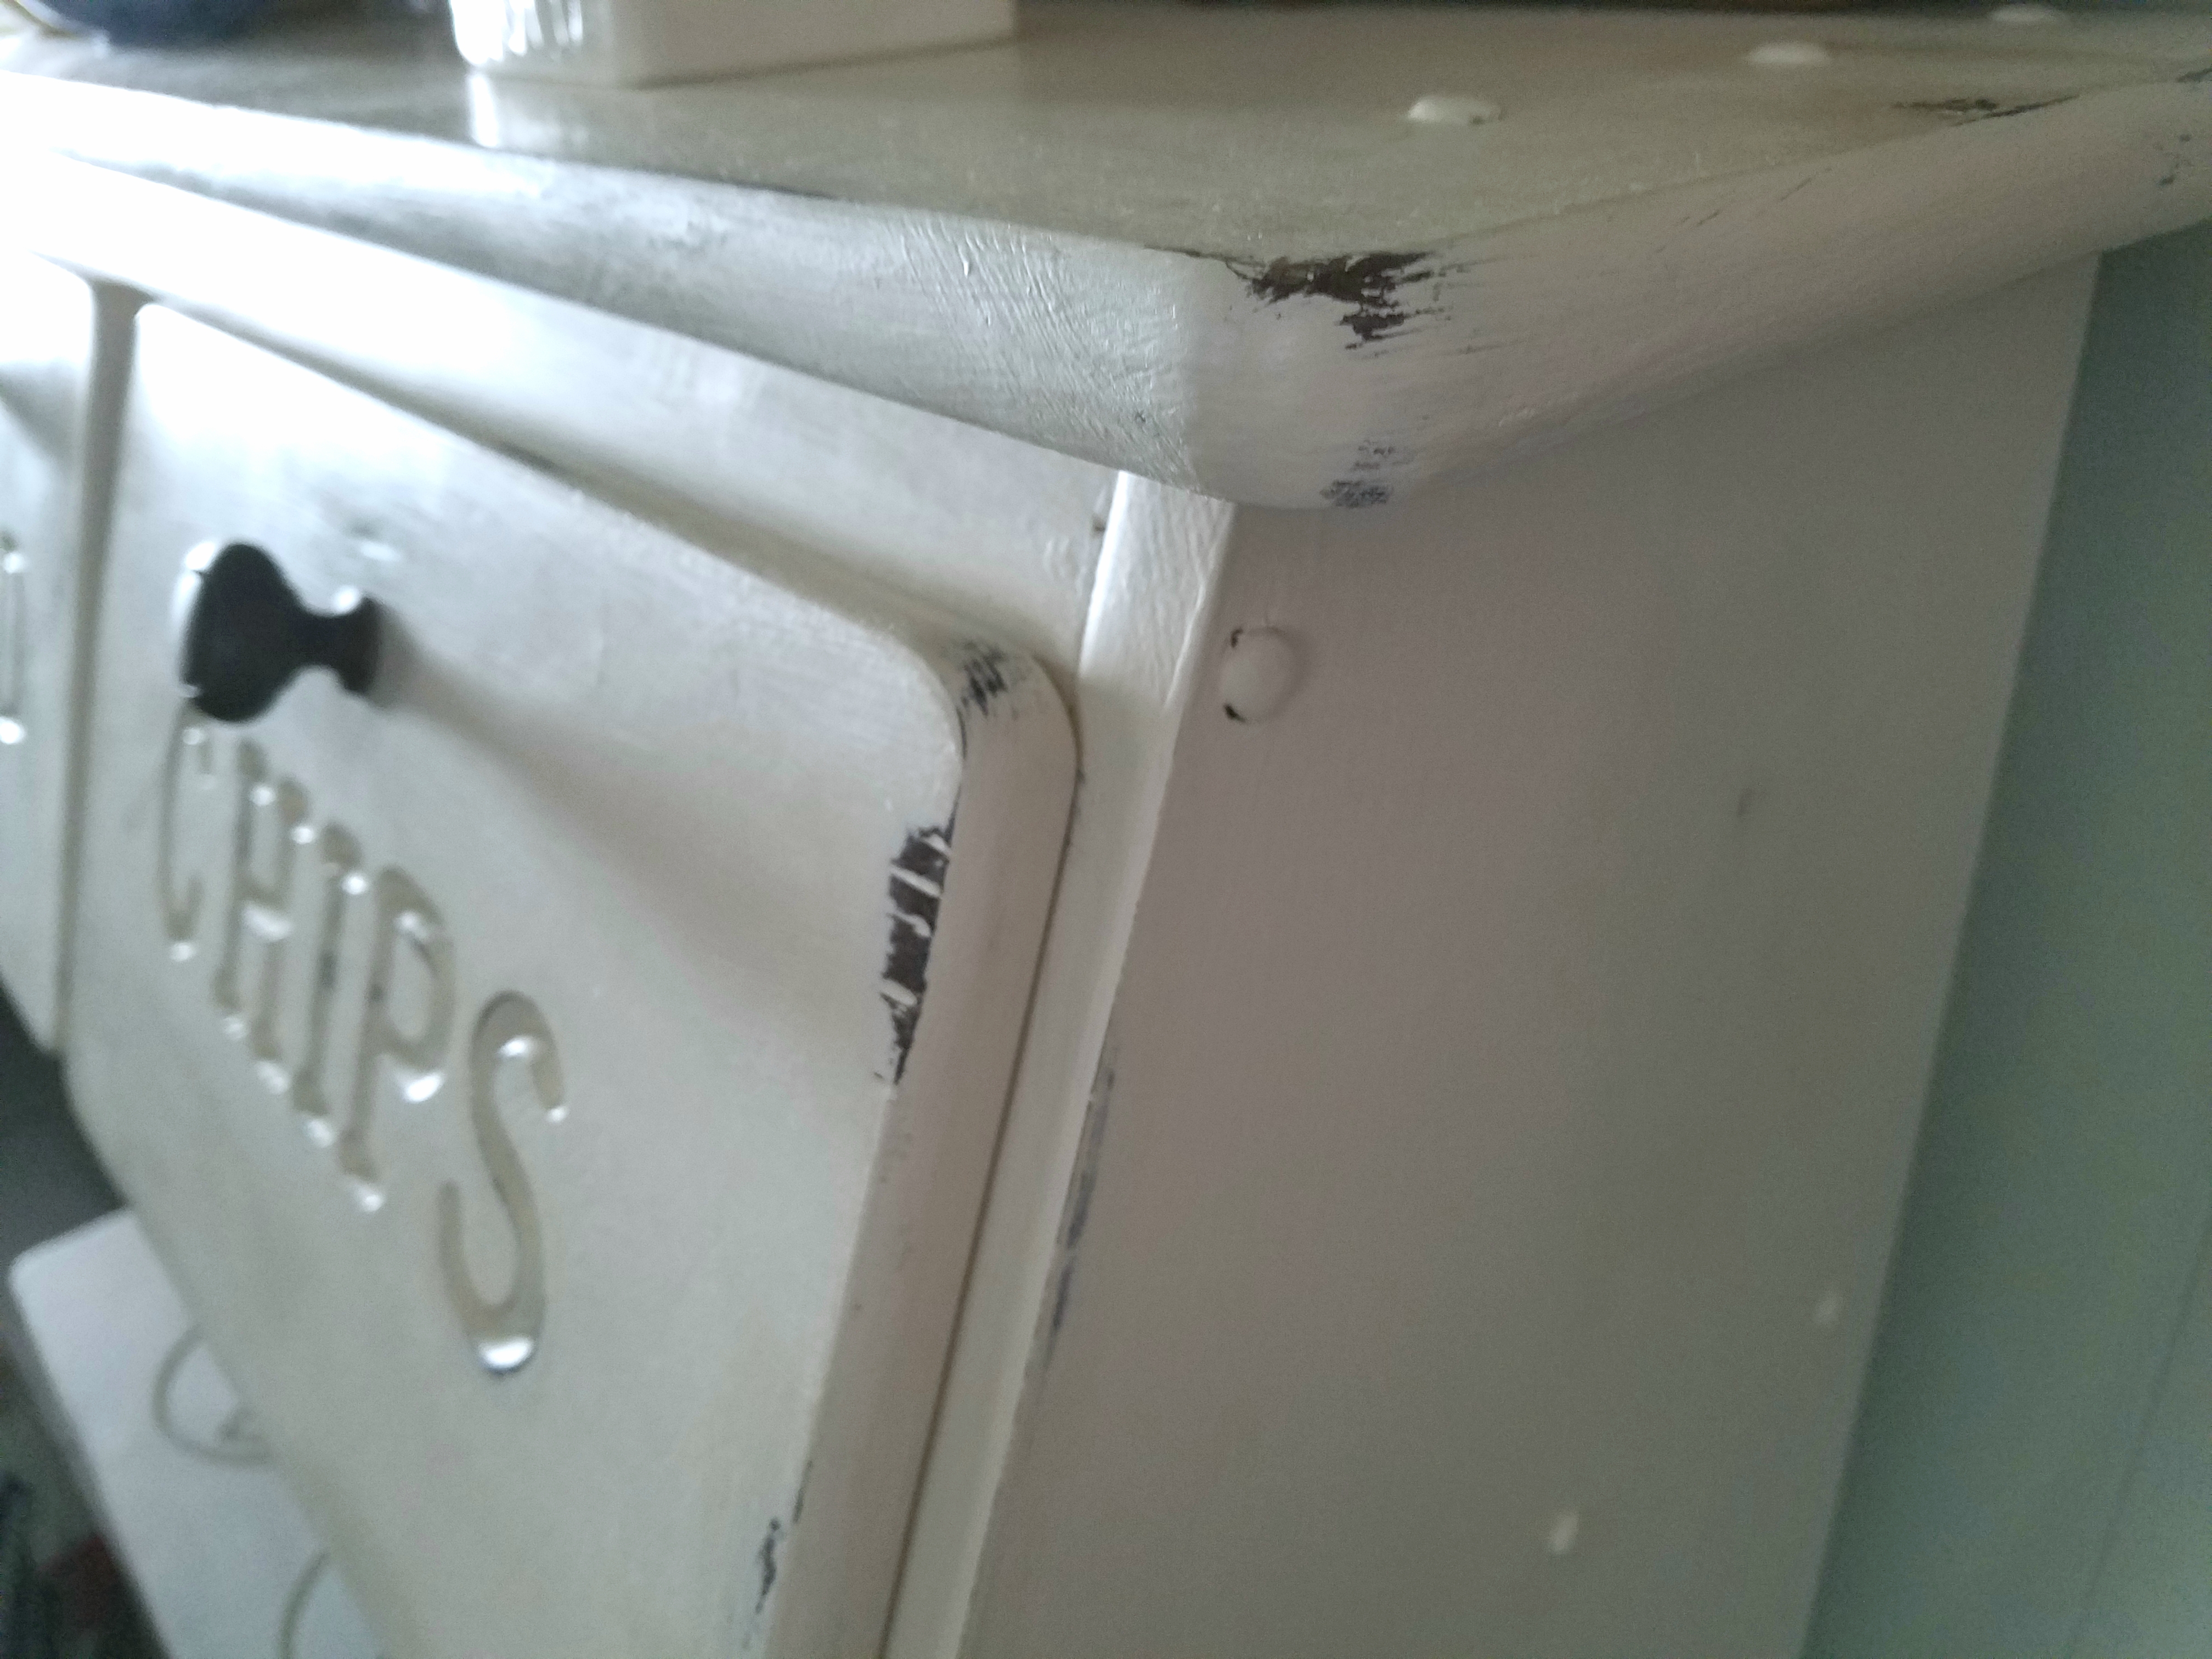
The whole project, from start to finish took me maybe 24 hours. That includes shopping, prep, clean up, and breaks. The painting was supper quick. I started at the top and worked my way down. By the time I got down to the bottom on my first coat, the top was dry enough to begin the second coat. At this point, dry time was taking longer – which is totally to be expected. I let it sit about 2 hours before I started distressing. Now, because I was doing this project in the kitchen I did not want extra dust floating around so I tried my hand at wet distressing. I loved it! It was very relaxing and not that messy. (I watched this video Annie made before starting.) I am so glad I didn’t use the sanding method. By wet distressing I was able to really get in there are bring out the character the cabinet had like the natural edge wear and surface scuffs from Mamaw using it.
The next morning I wiped down whole piece with a clean dry rag and began the wax and buffing processes. (Skip the gym on buffing day. You will definitely be giving your arms a workout!) I feel like I may have used more wax than necessary, but hey…it was my first time. And all it did was cause my arms to work a little harder to buff it out.
I waxed the entire piece top to bottom then went back and buffed with my cloth. To me, this is the most time efficient process since you should let your wax sit for at least 30 minutes before buffing. And in reality, I probably let it sit about 2 hours: I cleaned up brushes and everything else before I buffed.
Lastly, I reattached the door chains and put on the new hardware.
When I went to Lowe’s I couldn’t find anything that I loved in one style. So, I pieced together my own set, matching up the sizes with the old hardware as I went. I ended up with 3 different brands but color wise it all matched and I feel like that my mismatched hardware looks better than if I had gotten all one style.

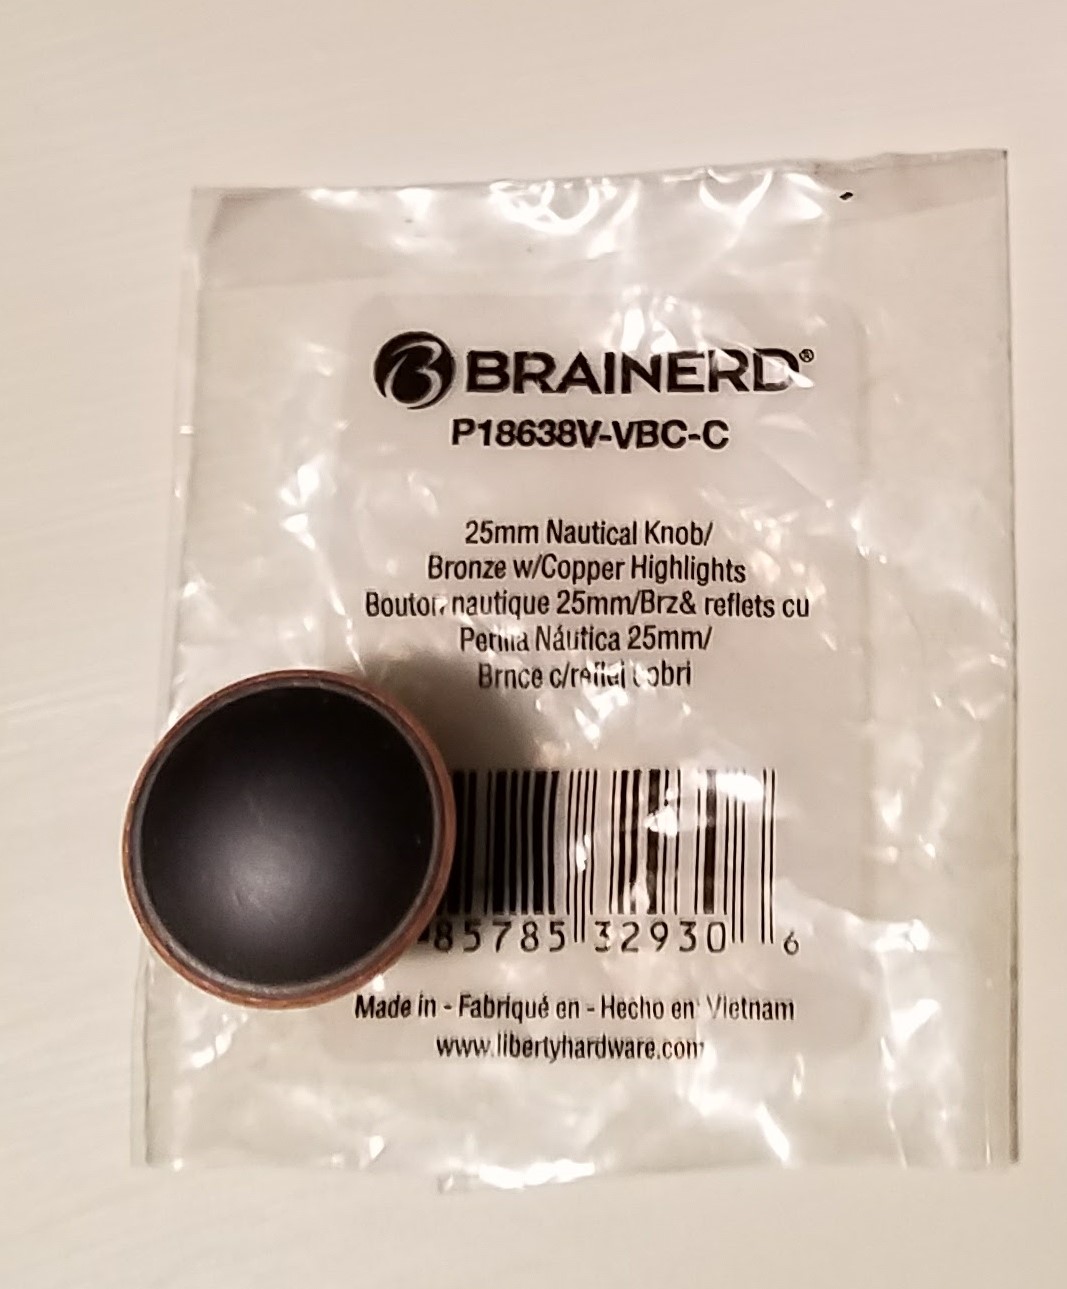
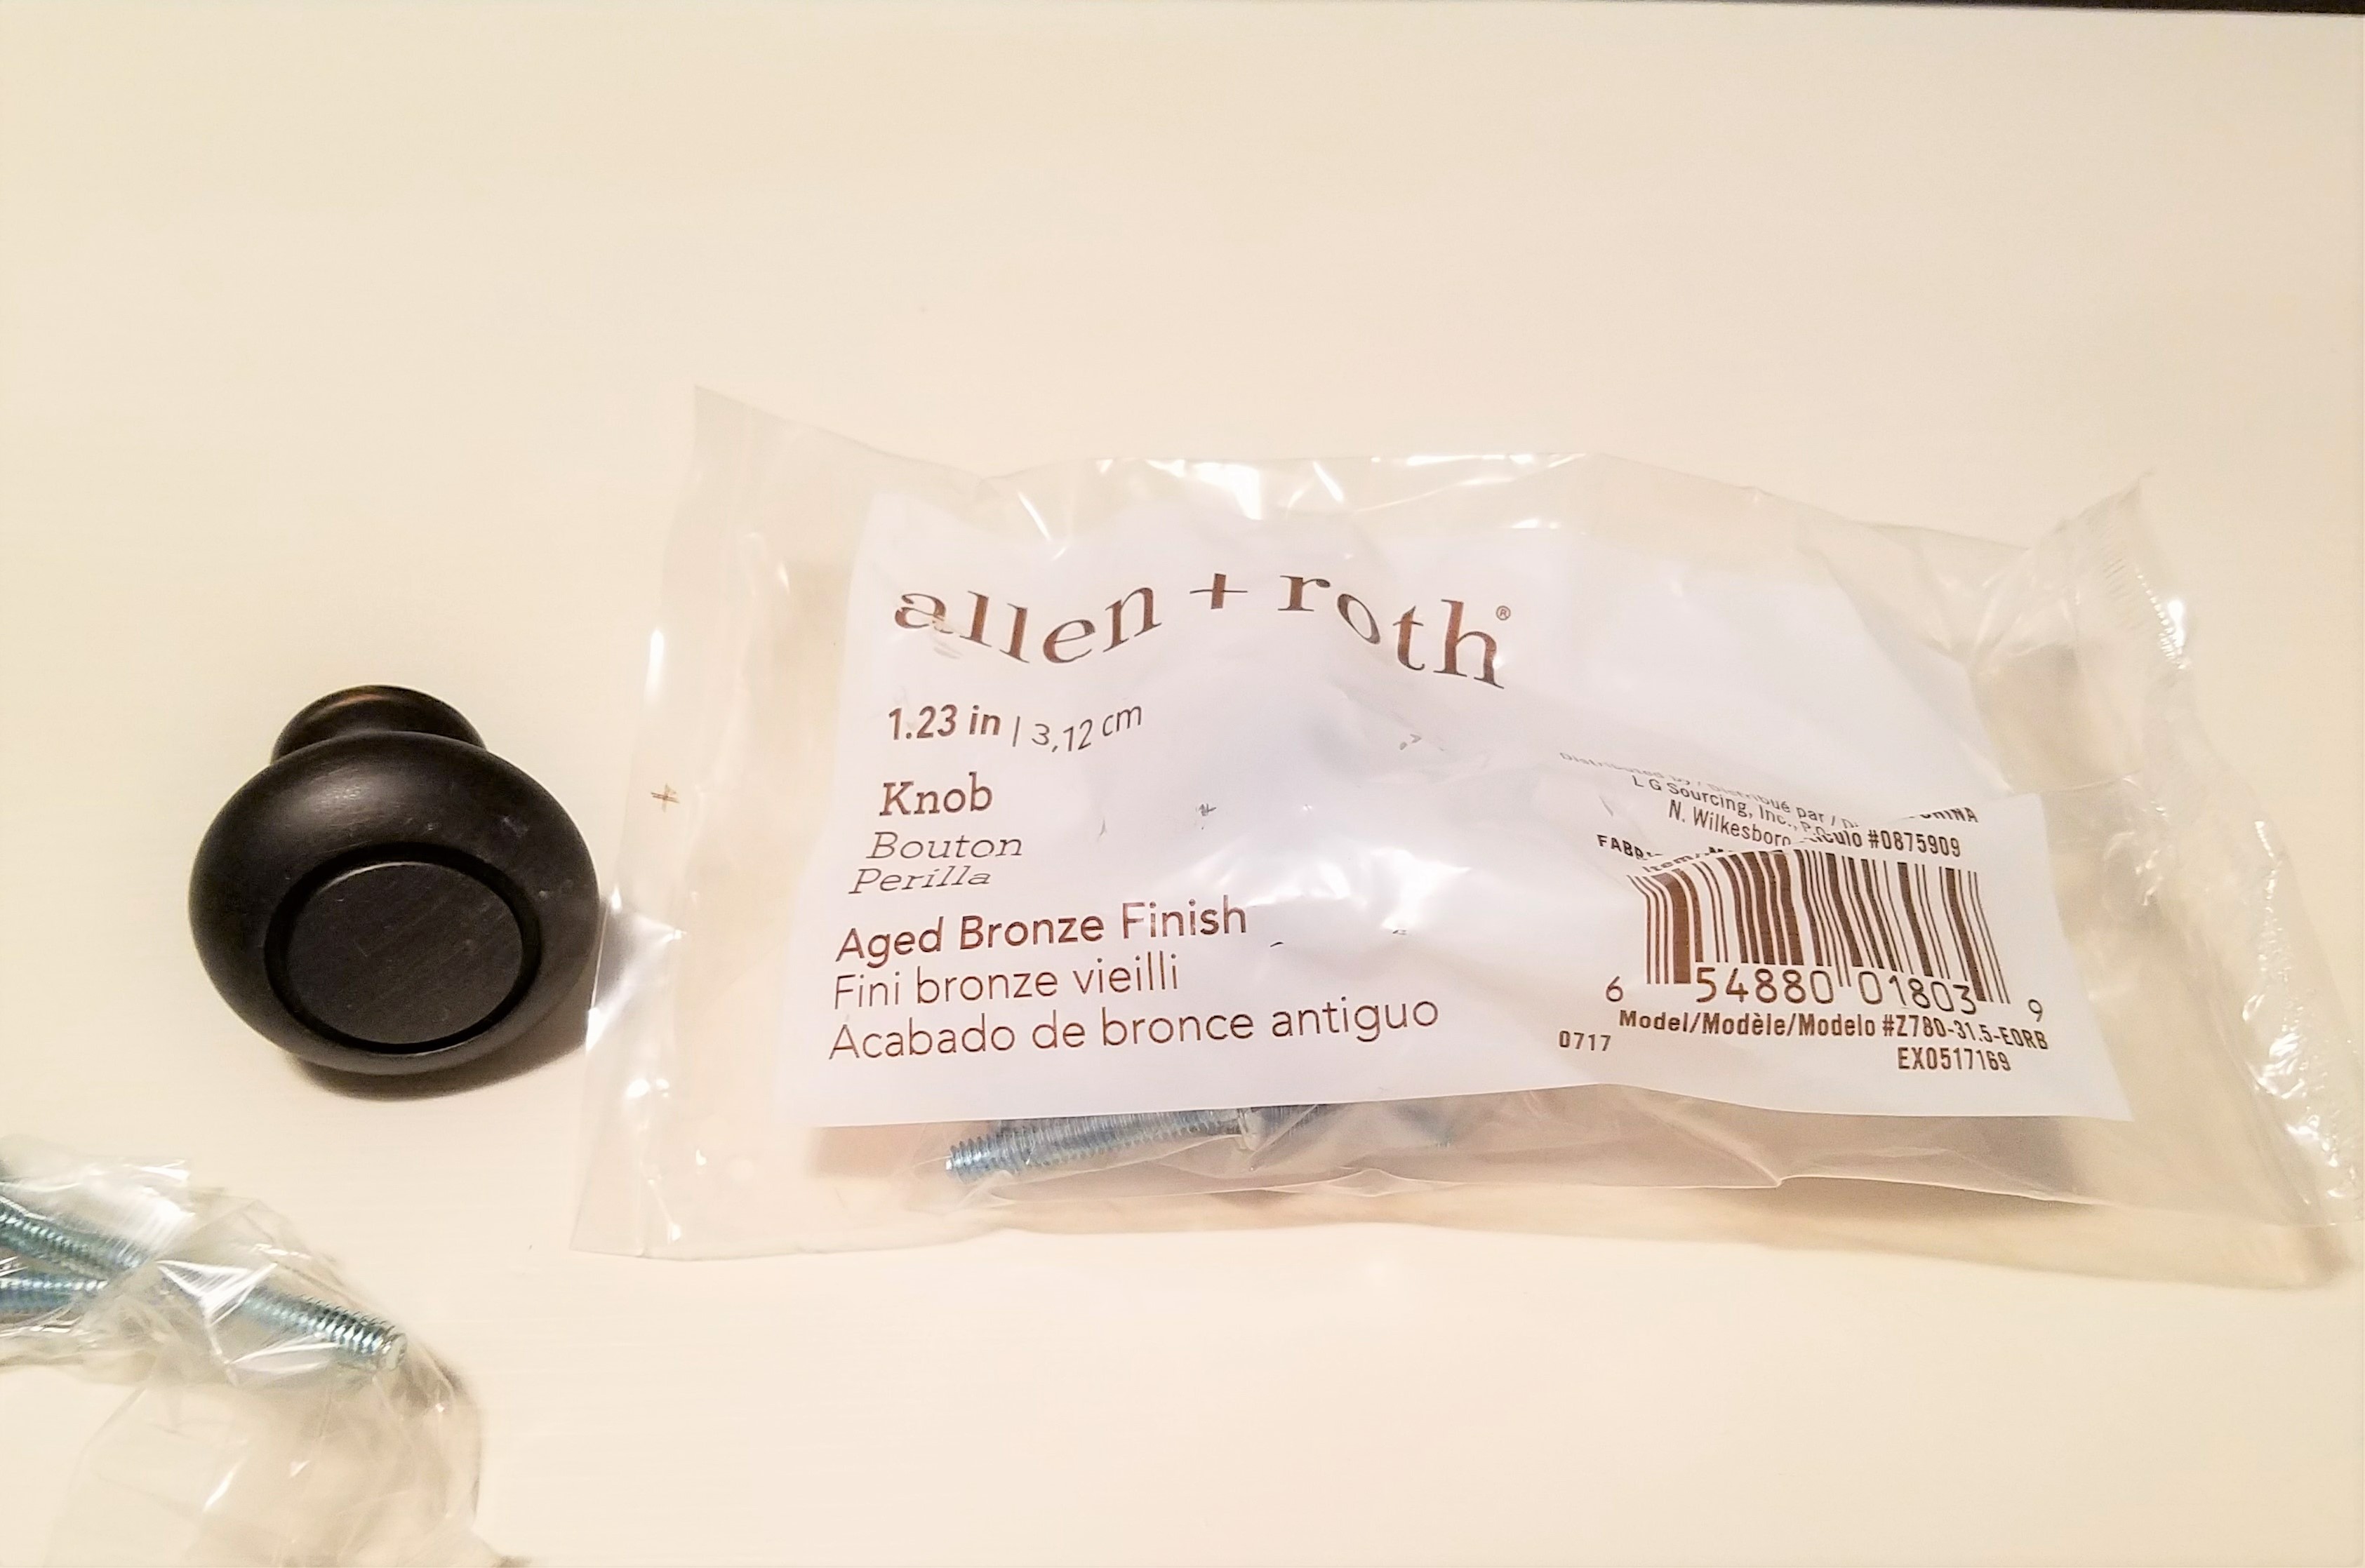
“Aged bronze”, “oil rubbed bronze”, or just “bronze”; what ever you want to call it, that’s the color hardware I used. The original hardware on the cabinet was white enamel with brass. And it really probably would have been okay to clean up and put back on but I wanted a more dramatic effect than tone on tone. Plus, bronze with antique white is one of my favorite farmhouse color combos. And you totally don’t notice that the knobs and handle are 3 different styles once on the cabinet.

I am extremely pleased with the finished product. I feel like the cabinet still looks like my Mamaw’s cabinet and still feels like my Mamaw’s cabinet. And NEWSFLASH!…it does not look outdated. (*nudge, nudge* Mr. O)
As far as the painting process, I will absolutely, no doubt about it, be using the Maison Blanche Furniture paint again. I wonder what project I can get going next?!

We just bought a tater cabinet which looks just like this one and trying to decide to paint it or restore it. Before deciding, do you remember when your Mamaw purchased it? We would like to figure out the age first. And then decide what type of paint and color. The “oyster” color you used is very pretty.
Hey, Sam! How exciting! I’m sorry but I do not know when it was purchased. It was always in my Mamaw’s house. Even before I was born, there are pictures of her kitchen with that cabinet in the background. But if and when you decide to redo your cabinet, I would love to see how it turns out!